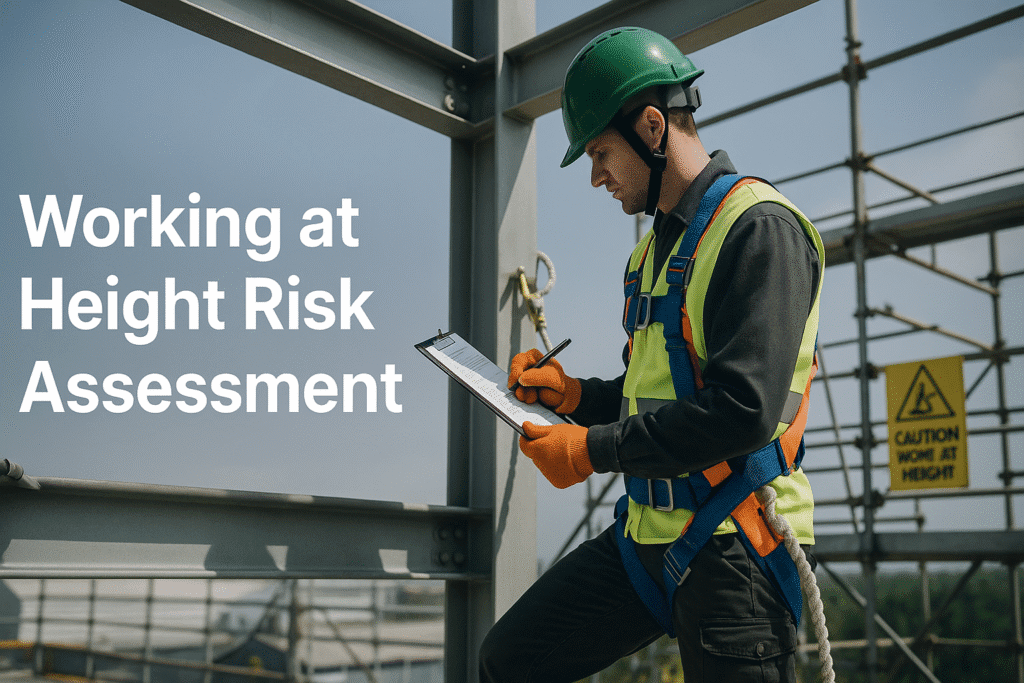
Working at Height Risk Assessment
📘 Introduction
When you’re hanging off the side of a building or fixing a light bulb three meters off the ground, you’re not just working—you’re working at height. And whether you’re a construction worker, maintenance tech, or site manager, a fall from height is no joke.
That’s why a Working at Height Risk Assessment isn’t optional—it’s a must. It helps identify risks, control hazards, protect lives, and comply with legal requirements.
Let’s walk through exactly how to conduct one like a pro.
📜 Legal Framework and Compliance
What Do the Laws Say?
Globally, different organizations and governments regulate work at height:
- OSHA (USA) – Fall protection required at elevations of 4 feet (general industry), 6 feet (construction), and any height above dangerous equipment.
- UK HSE – The Work at Height Regulations 2005 applies to all work at height where there is a risk of fall.
- India – Refer to Factories Act, IS 3696 Part I & II, and BOCW Act.
- ISO 45001:2018 – Emphasizes hazard identification and risk control.
Employer Duties Include:
- Planning and organizing all work at height.
- Providing proper equipment and PPE.
- Training workers and supervisors.
- Ensuring rescue plans are in place.
⚠️ Common Hazards When Working at Height
Working at height hazards vary depending on the job, but the most common include:
- Falls from ladders, scaffolds, roofs, or vehicles.
- Falling objects like tools or materials.
- Fragile surfaces like skylights or asbestos roofs.
- Unsafe equipment (e.g., cracked ladders or loose scaffolds).
- Weather conditions like wind or rain.
- Poor lighting or visibility.
🎯 Why Risk Assessment Is Non-Negotiable
Because you can’t prevent what you haven’t identified. A working at height risk assessment is a systematic approach to:
- Spot hazards.
- Evaluate risk levels.
- Implement control measures.
- Monitor outcomes.
- Update plans when needed.
🛠 The Hierarchy of Controls (From Most to Least Effective)
- Elimination – Can you avoid working at height altogether?
- Substitution – Can you use a safer method (e.g., extendable poles)?
- Engineering Controls – Guardrails, scaffolds, toe boards.
- Administrative Controls – Signage, shift rotation, permits.
- PPE – Harness, helmet, lanyard, gloves.
Tip: PPE should always be your last resort, not your first line of defense.
📝 Step-by-Step: How to Conduct a Working at Height Risk Assessment
1. Job Breakdown
Break the task into specific steps (e.g., setup, climbing, fixing, descending).
2. Identify Hazards
At each step, ask: “What could go wrong?” Consider objects, environment, equipment, and people.
3. Assess Risk Levels
Use a 5×5 matrix (next section) to determine the severity of each hazard.
4. Apply Controls
Use the hierarchy of control measures to mitigate identified risks.
5. Monitor and Review
Check the effectiveness of your controls. Review the assessment periodically or when conditions change.
📊 Working at Height Risk Assessment Matrix (5×5)
🟩 Risk Matrix Chart
| Severity ↓ / Likelihood → | Rare (1) | Unlikely (2) | Possible (3) | Likely (4) | Almost Certain (5) |
|---|---|---|---|---|---|
| Insignificant (1) | 1 | 2 | 3 | 4 | 5 |
| Minor (2) | 2 | 4 | 6 | 8 | 10 |
| Moderate (3) | 3 | 6 | 9 | 12 | 15 |
| Major (4) | 4 | 8 | 12 | 16 | 20 |
| Catastrophic (5) | 5 | 10 | 15 | 20 | 25 |
- Low (1–3): Acceptable risk
- Medium (4–6): Take action before proceeding
- High (7–15): Take immediate action
- Extreme (16–25): Do not proceed
📌 Sample Working at Height Risk Assessment Table
| S.No | Activity | Hazard | Risk (L×S) | Risk Level | Control Measures | Responsible Person |
|---|---|---|---|---|---|---|
| 1 | Climbing ladder to fix light | Fall from ladder | 4×4 = 16 | High | Use non-slip shoes, inspect ladder, secure it, maintain 3-point contact | Supervisor |
| 2 | Scaffold erection | Collapse due to instability | 3×5 = 15 | High | Use trained erectors, certified components, daily checks | Scaffolding Team |
| 3 | Rooftop painting (MEWP) | Tip-over of platform | 2×5 = 10 | High | Level ground, use outriggers, only trained operator | MEWP Operator |
| 4 | Working near edge (roof) | Slipping or losing balance | 3×4 = 12 | High | Guardrails, fall arrest system, anchor point usage | Worker |
| 5 | Carrying tools at height | Dropped objects injuring people below | 2×5 = 10 | High | Tool lanyards, barricade the area, use tool pouch | All Workers |
| 6 | Electrical pole maintenance | Electrical shock | 2×4 = 8 | Medium | Lockout/Tagout (LOTO), insulated gloves, voltage detection pen | Electrician |
| 7 | Cleaning roof in rainy season | Wet surface causing slips | 4×5 = 20 | Extreme | Postpone task, use non-slip boots, install temporary guardrails, monitor weather | HSE Officer |
🏗 Equipment Safety: Ladders, Scaffolds, and MEWPs
- Ladders – Must be industrial-grade, non-conductive, inspected before use.
- Scaffolds – Should be erected/dismantled only by competent persons; guardrails are a must.
- MEWPs – Only trained personnel should operate; use outriggers and fall protection.
⚠ Reminder: Inspect all equipment before each shift and after any incident.
🧯 Rescue Plan & Emergency Preparedness
A worker suspended in a harness can suffer suspension trauma within 15 minutes.
Rescue Plan Must Include:
- Who performs the rescue
- Type of rescue (lowering, raising, MEWP)
- Equipment needed (tripod, winch, stretcher)
- Emergency contact numbers
💡 Real Example:
In a warehouse, a painter slipped and hung mid-air. Rescue team lowered him in 4 minutes, thanks to a pre-planned mock drill.
🎓 Training and Competency
- All workers must undergo working at height training.
- Supervisors should be trained in hazard recognition and rescue.
- Refreshers are required annually or after incidents.
Topics should include:
- Risk assessment basics
- PPE usage
- Emergency procedures
- Hands-on practice
📋 Documentation and Records
- Risk Assessments – Task- and site-specific
- Permits to Work – Especially for high-risk or non-routine jobs
- Toolbox Talks – Before every shift
- Inspection Logs – For ladders, harnesses, scaffolds
Maintain digital or paper records for audits and investigations.
❌ Common Mistakes to Avoid
- Relying only on PPE
- Ignoring weather forecasts
- Not checking ladder footing or ground stability
- No rescue plan in place
- Using expired or damaged harnesses
💡 Benefits of a Solid Risk Assessment
- Fewer injuries = Higher productivity
- Boosts worker morale
- Legal compliance & protection
- Easier insurance claims
- Improved safety culture
✅ Conclusion
Don’t leave safety to chance.
When it comes to working at height, a fall can mean the difference between life and death. Risk assessments help you control what can be controlled—before the unthinkable happens.
Do it not just for compliance… but for your people, your peace of mind, and your professional reputation.
Chemical Processing Risk Assessment
Manufacturing Plant Risk Assessment
Construction Site Risk Assessment
Layers of Protection Analysis (LOPA)
❓ Frequently Asked Questions (FAQs)
1. What height is considered “working at height”?
Anything above 2 meters (6.5 feet) is considered working at height. But even a fall from 1 meter can cause serious injury.
2. Is PPE enough protection for working at height?
No. PPE is the last line of defense, not a substitute for guardrails, safe access equipment, or proper planning.
3. Can I reuse risk assessments from another site?
Only if the tasks, equipment, and environment are identical. Otherwise, conduct a site-specific assessment.
4. How often should a risk assessment be reviewed?
Regularly, and especially after:
- Any incident or near-miss
- Change in work method
- New equipment or personnel
5. Is training mandatory before working at height?
Yes. Untrained personnel must never be allowed to work at height.

